How To Master Stihl FSA 60 R String Replacement Like A Pro
Replacing the string on your Stihl FSA 60 R doesn’t have to be a headache. If you’ve ever felt frustrated trying to figure out how this works, you’re not alone. Many users find themselves scratching their heads when it comes to maintaining their trimmer. But don’t worry—we’ve got your back. This guide will walk you through every step, making sure you can tackle the job with confidence.
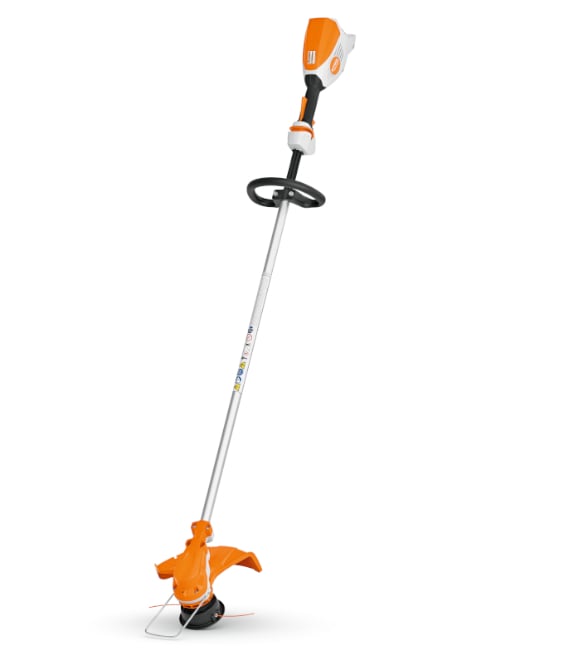
Let’s face it, owning a Stihl FSA 60 R is awesome. It’s powerful, lightweight, and perfect for keeping your lawn in check. But just like any tool, it needs a little TLC now and then. And one of the most common maintenance tasks? Yep, you guessed it—string replacement. Whether the string has worn out or snapped during use, knowing how to replace it quickly is key to keeping your trimmer in top shape.
Now, before we dive into the nitty-gritty, let’s clear something up. Replacing the string isn’t rocket science, but it does require some attention to detail. With the right steps and a bit of patience, you’ll have your Stihl FSA 60 R back in action faster than you can say “weed whacker.” So grab your tools, roll up those sleeves, and let’s get started!
Read also:Bollyflixhow Your Ultimate Guide To Streaming Bollywood Movies
Why String Replacement Matters for Your Stihl FSA 60 R
First things first, why does string replacement even matter? Well, think of the string as the heart of your trimmer. Without it, your Stihl FSA 60 R isn’t going to do much trimming. Over time, the string wears down from constant use, and eventually, it’ll break. If you don’t replace it promptly, you’ll end up with an ineffective tool that’s basically useless for cutting grass or weeds.
Plus, replacing the string regularly helps prolong the life of your trimmer. It prevents unnecessary strain on the motor and ensures optimal performance. Who wants a trimmer that sputters out halfway through the job? Not us! By staying on top of maintenance, you save yourself from headaches and potential repair costs down the line.
Common Signs It’s Time for a String Change
Before we jump into the replacement process, how do you know when it’s time to swap out the string? Here are a few telltale signs:
- The string is visibly frayed or worn out.
- You notice the string breaking frequently during use.
- There’s reduced cutting power, meaning the trimmer isn’t doing its job effectively.
- You hear unusual noises coming from the trimmer head.
These signs are your trimmer’s way of saying, “Hey, I need some love!” Ignoring them could lead to bigger problems, so it’s always best to address them sooner rather than later.
Understanding the Stihl FSA 60 R Trimmer Head
Before diving into the replacement process, it’s important to understand the anatomy of the Stihl FSA 60 R trimmer head. The trimmer head is where all the action happens, and knowing its components will make the replacement process a breeze.
The Stihl FSA 60 R uses a dual-line trimmer head, which means it has two strings instead of one. This design allows for more efficient cutting and better coverage. The head itself consists of a spool, a cap, and a locking mechanism that keeps everything securely in place. Familiarizing yourself with these parts will help you navigate the replacement process with ease.
Read also:Miu Shiramine The Rising Star Who Captures Hearts Worldwide
Tools You’ll Need for Stihl FSA 60 R String Replacement
Now that you know what you’re dealing with, let’s talk about the tools you’ll need. Thankfully, you won’t need much—just a few basic items:
- A new spool of string (make sure it’s the correct size for your Stihl FSA 60 R).
- A pair of gloves to protect your hands.
- A small screwdriver (optional, depending on your model).
- A flat surface to work on.
Having these tools ready will make the process smoother and faster. Trust us, you don’t want to be scrambling for supplies halfway through the job.
Step-by-Step Guide to Replacing the String
Alright, let’s get down to business. Here’s a step-by-step guide to replacing the string on your Stihl FSA 60 R:
Step 1: Turn Off the Trimmer
Safety first, folks! Before you start tinkering with the trimmer head, make sure the Stihl FSA 60 R is turned off and the battery is disconnected. You don’t want any accidental starts while you’re working.
Step 2: Remove the Trimmer Head Cap
Using your fingers or a small screwdriver, gently pry off the cap of the trimmer head. Be careful not to damage it, as you’ll need to reattach it later. Once the cap is off, you’ll see the spool inside.
Step 3: Take Out the Old Spool
Remove the old spool from the trimmer head. If the string is completely broken, you might need to pull it out piece by piece. Don’t worry if it’s a bit messy—this is normal.
Step 4: Prepare the New String
Cut a length of new string according to the recommended size for your Stihl FSA 60 R (usually around 2.4mm). You’ll need two pieces, each about 10 feet long. This ensures you have enough string to wind around the spool.
Step 5: Load the New String
Insert the ends of the two strings into the designated holes on the spool. Make sure they’re securely in place before winding them around the spool. Follow the winding direction indicated on the spool—usually clockwise.
Step 6: Reassemble the Trimmer Head
Once the strings are wound, place the spool back into the trimmer head and reattach the cap. Make sure everything is snug and secure. Give it a gentle tug to ensure the strings are feeding properly.
Step 7: Test the Trimmer
Reconnect the battery and turn on the Stihl FSA 60 R. Let it run for a few seconds to test the new string. If everything looks good, you’re ready to go!
Tips and Tricks for Stihl FSA 60 R Maintenance
Replacing the string is just one part of maintaining your Stihl FSA 60 R. Here are a few extra tips to keep your trimmer in tip-top shape:
- Regularly clean the trimmer head to prevent debris buildup.
- Check the battery life and charge it as needed.
- Inspect the trimmer for any signs of wear and tear.
- Store the trimmer in a dry place when not in use.
By following these tips, you’ll ensure your Stihl FSA 60 R lasts for years to come.
Common Mistakes to Avoid
Even the best of us make mistakes sometimes. Here are a few common errors to watch out for when replacing the string on your Stihl FSA 60 R:
- Using the wrong size string—always double-check the specifications.
- Overwinding the spool, which can cause the strings to jam.
- Not securing the cap properly, leading to potential accidents.
Avoiding these mistakes will save you time and frustration in the long run.
Where to Buy Replacement Strings
Now that you know how to replace the string, where can you get the right ones? Your local Stihl dealer is always a safe bet, as they’ll have the exact parts you need. Alternatively, you can order replacement strings online from trusted retailers like Amazon or Home Depot. Just be sure to verify that the string size matches your Stihl FSA 60 R specifications.
Conclusion: Stay Trim and Ready
And there you have it—a comprehensive guide to Stihl FSA 60 R string replacement. By following these steps and tips, you’ll keep your trimmer running smoothly and efficiently. Remember, regular maintenance is key to prolonging the life of your tool, so don’t neglect those routine checks.
We’d love to hear from you! Have any questions or tips of your own? Drop a comment below and let’s chat. And if you found this guide helpful, don’t forget to share it with your fellow lawn care enthusiasts. Happy trimming!
Table of Contents
How to Master Stihl FSA 60 R String Replacement Like a Pro
Why String Replacement Matters for Your Stihl FSA 60 R
Common Signs It’s Time for a String Change
Understanding the Stihl FSA 60 R Trimmer Head
Tools You’ll Need for Stihl FSA 60 R String Replacement
Step-by-Step Guide to Replacing the String
Tips and Tricks for Stihl FSA 60 R Maintenance
Article Recommendations