How To Master Stihl FSA 60 R String Replacement: A Comprehensive Guide For DIY Enthusiasts
Replacing the string on your Stihl FSA 60 R can be a game-changer for your gardening adventures. If you've ever found yourself scratching your head, wondering how to get this done without calling in the pros, you're in the right place. In this guide, we'll break down everything you need to know about Stihl FSA 60 R string replacement, from the basics to advanced tips. Let's dive in and make your life easier!
So, why is knowing how to replace the string on your Stihl FSA 60 R so important? Well, imagine this: you're out there, trimming your lawn like a pro, and suddenly—snap! The string gives out. Frustrating, right? But don't sweat it. With a little know-how, you can handle this situation like a boss and get back to your gardening game in no time.
Before we get into the nitty-gritty, let's set the scene. Whether you're a seasoned gardener or just starting out, having a reliable trimmer is key. And when it comes to reliability, Stihl has got your back. The FSA 60 R is no exception, but even the best tools need a little TLC now and then. Let's make sure you're equipped to handle it like a pro.
Read also:Vegamoviesfi Your Ultimate Movie Streaming Destination
Now that we've laid the groundwork, let's jump into the details. Here's a quick roadmap of what we'll cover:
- Understanding the Stihl FSA 60 R and its features
- Why string replacement matters
- Step-by-step guide to replacing the string
- Common mistakes to avoid
- Tips for maintaining your trimmer
- FAQs about Stihl FSA 60 R string replacement
Understanding the Stihl FSA 60 R: A Quick Overview
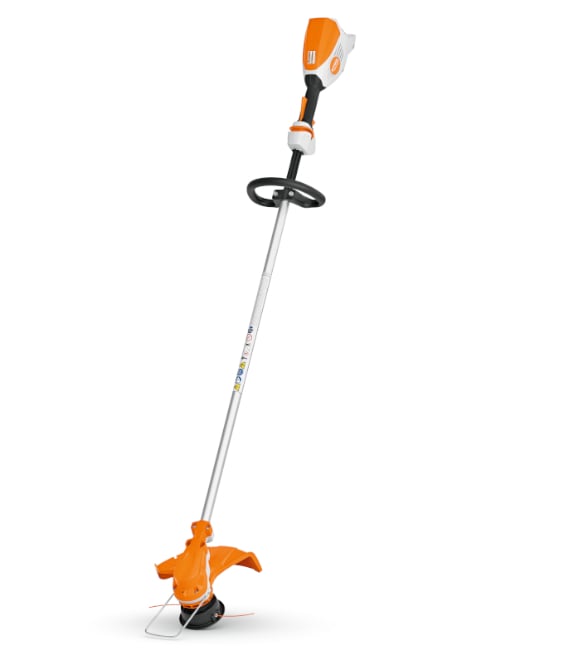
Let's start by getting to know the Stihl FSA 60 R a little better. This bad boy is part of Stihl's cordless lineup, designed to give you power and precision without the hassle of cords or gas. It's lightweight, easy to maneuver, and perfect for small to medium-sized yards. But like any tool, it needs a bit of maintenance to keep it running smoothly.
The FSA 60 R is equipped with an AutoCut 20-2 tap head, which makes string replacement a breeze. This feature allows you to quickly reload the string without having to disassemble the entire head. Pretty cool, right? But if you're new to this, don't worry—we'll walk you through every step.
Why String Replacement Matters
Now, let's talk about why replacing the string is so crucial. Over time, the string on your trimmer will wear down or break, especially if you're using it frequently. A worn-out string can affect the performance of your trimmer, leading to uneven cuts and frustration. Plus, who wants to deal with a string that keeps snapping in the middle of a job?
By learning how to replace the string yourself, you'll save time and money. No more trips to the repair shop or waiting for someone else to fix it for you. You'll be the master of your own gardening destiny!
Step-by-Step Guide to Stihl FSA 60 R String Replacement
Ready to roll up your sleeves and get to work? Follow these simple steps to replace the string on your Stihl FSA 60 R:
Read also:Moviehub4uin Your Ultimate Movie Destination
Gather Your Tools
First things first, you'll need a few tools to get the job done:
- New trimming line (make sure it's the right diameter for your AutoCut 20-2 head)
- A pair of scissors or a knife
- A small screwdriver (optional)
Step 1: Remove the Spool
Begin by turning off your trimmer and disconnecting the battery. Safety first, folks! Once that's done, locate the AutoCut 20-2 head at the bottom of your trimmer. Unscrew the cap by turning it counterclockwise. You might need to use a little elbow grease, but it should come off easily.
Step 2: Clear Out the Old String
Take a look inside the spool. If there's any old string left, pull it out. You'll also want to check for any debris or dirt that might have accumulated. A clean spool is a happy spool!
Step 3: Load the New String
Cut a piece of trimming line to the appropriate length (usually around 15 feet). Thread one end of the string through the hole in the center of the spool. Make sure the string is seated securely in the groove. Then, wind the string around the spool in a clockwise direction.
Step 4: Secure the String
Once you've wound the string, tuck the end into the locking notch on the spool. This will keep it in place while you reassemble the head. If the string doesn't fit snugly, trim it down a bit with your scissors.
Step 5: Reassemble the Head
Now it's time to put everything back together. Place the spool back into the head and screw the cap on tightly. Give it a good twist to make sure it's secure. And there you have it—your Stihl FSA 60 R is ready to go!
Common Mistakes to Avoid
Even the best of us make mistakes sometimes. Here are a few common pitfalls to watch out for when replacing the string on your Stihl FSA 60 R:
- Using the wrong string diameter: Make sure you're using the correct size string for your AutoCut 20-2 head. Using the wrong diameter can cause performance issues.
- Not winding the string correctly: Take your time when winding the string. If it's not seated properly in the groove, it could come loose during use.
- Forgetting to trim the string: After reassembling the head, give the string a little tug to make sure it feeds properly. If it's too long, trim it down to the right length.
Tips for Maintaining Your Trimmer
Now that you know how to replace the string, let's talk about keeping your Stihl FSA 60 R in tip-top shape. Here are a few maintenance tips to keep in mind:
- Regularly check the string for wear and tear. Replace it as needed.
- Clean the head and spool after each use to prevent buildup of dirt and debris.
- Store your trimmer in a dry place when not in use.
- Follow the manufacturer's guidelines for battery care to ensure long-lasting performance.
FAQs About Stihl FSA 60 R String Replacement
Q: How often should I replace the string on my Stihl FSA 60 R?
A: It depends on how frequently you use your trimmer. As a general rule, check the string after every few uses and replace it if you notice any signs of wear.
Q: Can I use any type of trimming line for my Stihl FSA 60 R?
A: No, you should only use trimming line that's specifically designed for the AutoCut 20-2 head. Using the wrong type of string can damage your trimmer.
Q: Is it difficult to replace the string on a Stihl FSA 60 R?
A: Not at all! With a little practice, you'll be able to replace the string in no time. Just follow the steps we outlined above, and you'll be good to go.
Conclusion: Take Control of Your Stihl FSA 60 R
And there you have it—a comprehensive guide to Stihl FSA 60 R string replacement. Whether you're a seasoned pro or a gardening newbie, mastering this skill will save you time, money, and frustration. Remember to follow the steps carefully, avoid common mistakes, and keep your trimmer well-maintained for optimal performance.
Now it's your turn to take action. Share this guide with your fellow gardening enthusiasts, leave a comment with your tips and tricks, or check out our other articles for more DIY inspiration. Happy trimming, and may your lawn always be picture-perfect!
Table of Contents
- Understanding the Stihl FSA 60 R: A Quick Overview
- Why String Replacement Matters
- Step-by-Step Guide to Stihl FSA 60 R String Replacement
- Gather Your Tools
- Step 1: Remove the Spool
- Step 2: Clear Out the Old String
- Step 3: Load the New String
- Step 4: Secure the String
- Step 5: Reassemble the Head
- Common Mistakes to Avoid
- Tips for Maintaining Your Trimmer
- FAQs About Stihl FSA 60 R String Replacement
- Conclusion: Take Control of Your Stihl FSA 60 R
Article Recommendations